 Pin It
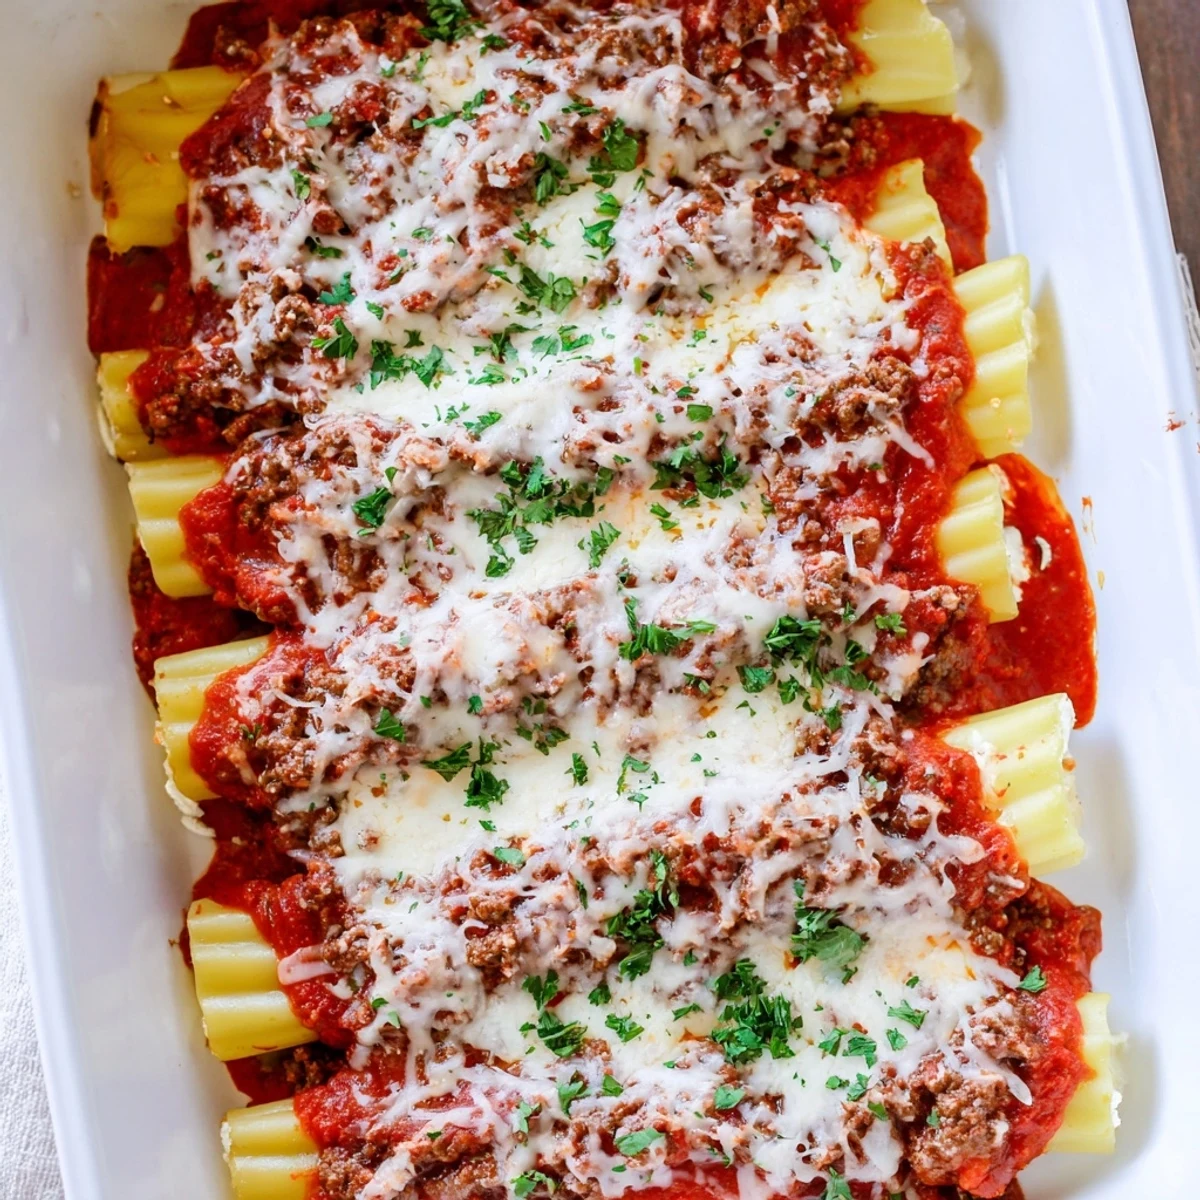
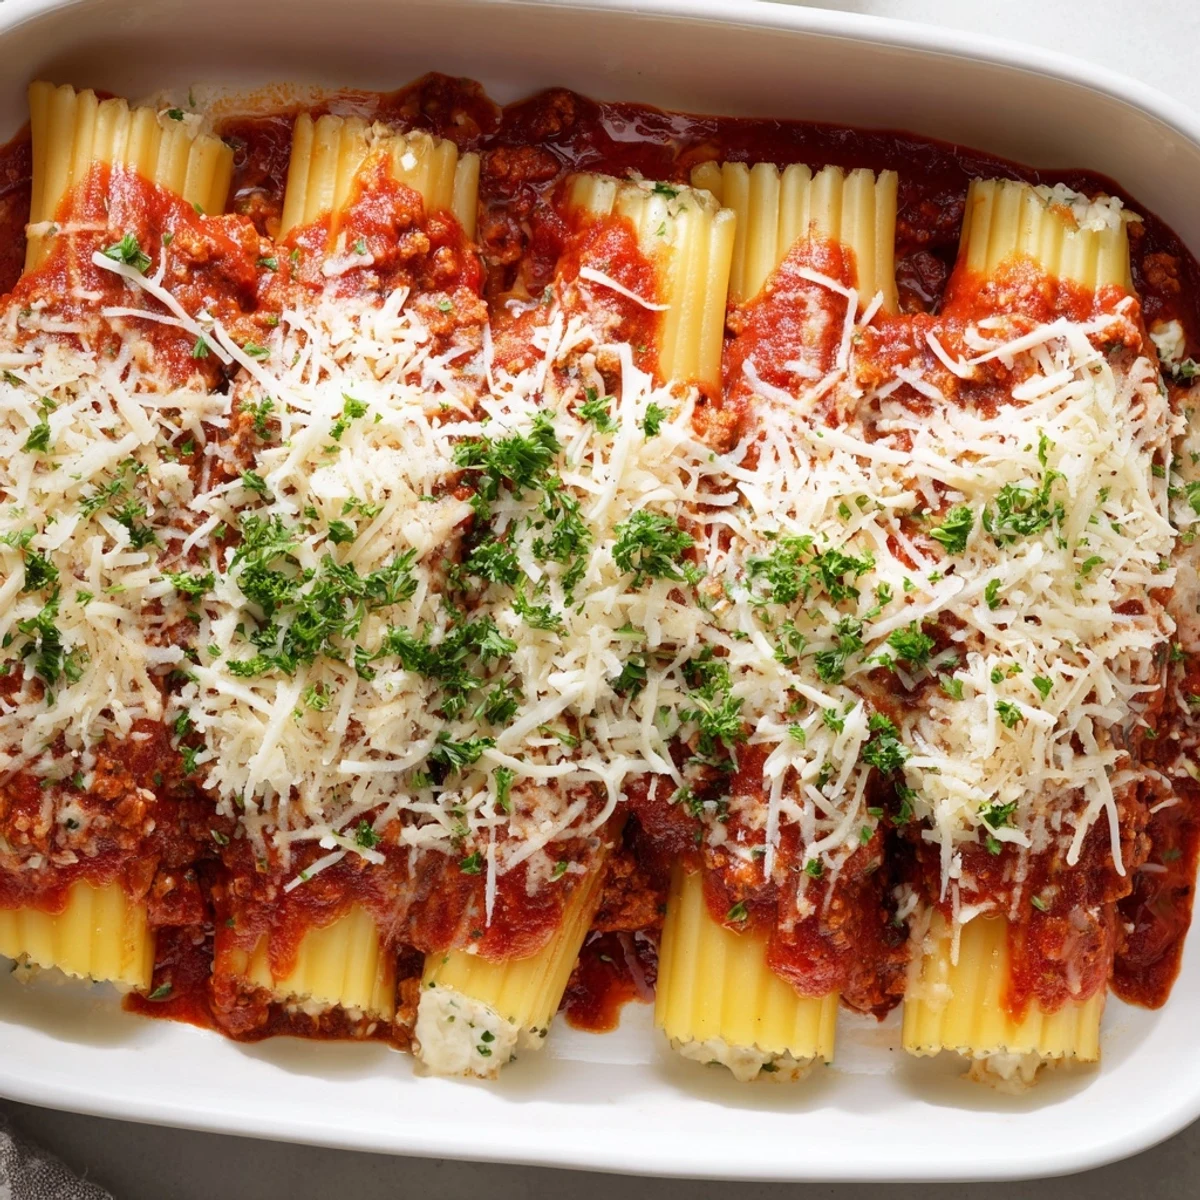
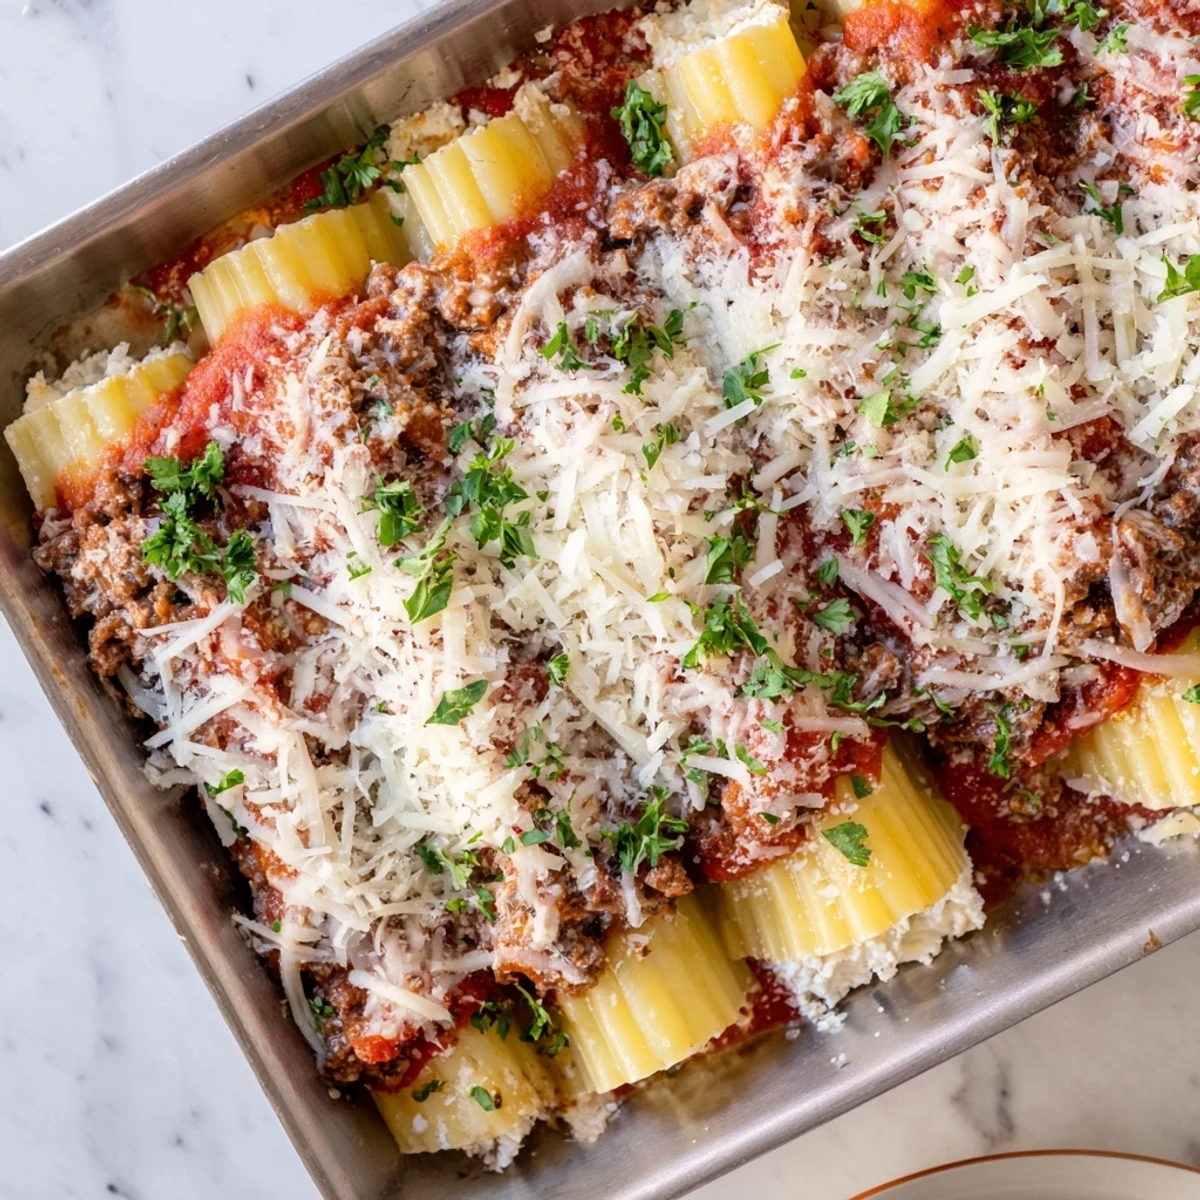
 Delicate pasta tubes are generously filled with a smooth, creamy blend of ricotta, mozzarella, and Parmesan cheeses, accented with fresh herbs and a hint of nutmeg. The stuffed shells are nestled in a robust, slow-simmered meat sauce made with ground beef, aromatic onions, garlic, and a trio of tomato products, then baked until the cheese topping turns golden and bubbly. This hearty Italian favorite delivers perfect comfort food satisfaction with every forkful.
The first time I made stuffed manicotti, I accidentally ripped almost every shell trying to fill them with a spoon, creating what my husband affectionately called deconstructed manicotti chaos. That kitchen disaster taught me that a zip-top bag with the corner snipped off is absolutely essential for filling pasta tubes without losing your mind or your patience.
I served this at a winter dinner party once when the temperature outside was below freezing, and watching my friends huddle around the baking dish as I pulled it from the oven, steam rising and cheese bubbling, was exactly the kind of comfort food moment that makes cooking for people so rewarding. Everyone went quiet for that first bite.
Ingredients
- 1 tbsp olive oil: Creates the foundation for your meat sauce, helping those onions soften beautifully without burning
- 1 medium onion, finely chopped: The aromatic base that builds depth, so take your time letting them turn translucent and sweet
- 2 garlic cloves, minced: Fresh is absolutely worth it here, and mincing it evenly prevents any bitter raw bites
- 1 lb ground beef: Provides that hearty richness, though draining the fat keeps the sauce from becoming greasy
- 1 can crushed tomatoes and 1 can tomato sauce: The crushed tomatoes give texture while the sauce provides smooth velvety body
- 2 tbsp tomato paste: Concentrates the tomato flavor and helps thicken everything naturally
- 1 tsp dried basil and 1 tsp dried oregano: Classic Italian herbs that bloom beautifully in the hot oil with your onions
- ½ tsp red pepper flakes: Optional but adds just a whisper of warmth that makes everything taste more vibrant
- 1 tsp sugar: Balances the acidity of canned tomatoes, a trick I learned from an Italian neighbor
- 1 container ricotta cheese: Whole milk ricotta makes the filling creamiest, though part skim works in a pinch
- 1½ cups shredded mozzarella and ¾ cup grated Parmesan: This cheese combination creates that perfect stretchy golden top everyone fights over
- 1 large egg: Binds the filling together so it does not turn into a loose mess when you cut into the pasta
- 2 tbsp chopped fresh parsley: Fresh adds brightness, but dried works perfectly fine if that is what you have
- ¼ tsp ground nutmeg: The unexpected warm spice that elevates the filling from basic to something special
- 12 manicotti shells: Cooking them slightly underdone is crucial because they finish softening in the oven
- Additional mozzarella and Parmesan for topping: Never skimp on the cheese layer because that golden bubbling top is the best part
Instructions
- Get your oven ready:
- Preheat to 375°F and give your 9×13 baking dish a light coating of oil so nothing sticks
- Build the sauce foundation:
- Heat olive oil in a large skillet over medium heat and cook those chopped onions for 3-4 minutes until they turn translucent and smell amazing
- Add the garlic moment:
- Throw in the minced garlic for just 1 minute because burnt garlic turns bitter and ruins the whole sauce
- Brown the beef:
- Crumble in the ground beef and cook until browned, breaking it up with your spoon as it cooks
- Drain the fat:
- Pour off the excess grease so your sauce is rich but not swimming in oil
- Simmer the sauce:
- Stir in both tomatoes, tomato paste, basil, oregano, red pepper flakes, sugar, salt and pepper
- Let it develop:
- Simmer uncovered for 15-20 minutes, giving it an occasional stir as it thickens beautifully
- Cook the pasta smart:
- Boil manicotti for 1-2 minutes less than the package says, then rinse with cold water to stop the cooking
- Mix the filling:
- Combine ricotta, mozzarella, Parmesan, egg, parsley, nutmeg, salt and pepper until smooth
- Fill the shells:
- Spoon the cheese mixture into a zip-top bag, snip the corner, and pipe it into each manicotti tube
- Start the layers:
- Spread 1 cup of meat sauce across your prepared baking dish
- Nestle the pasta:
- Arrange filled manicotti in a single layer over that sauce base
- Sauce and top:
- Spoon remaining sauce over the pasta and sprinkle with extra mozzarella and Parmesan
- Bake covered:
- Cover with foil and bake for 25 minutes to heat everything through
- Get that golden top:
- Uncover and bake 10-15 minutes more until the cheese is bubbly and gorgeous
- Patience pays:
- Let it rest 10 minutes before serving so everything sets up nicely
 Pin It
 This recipe became my go-to for new parents and families dealing with illness because it freezes beautifully and reheats like a dream. Something about tender pasta tubes stuffed with cheese and covered in meat sauce just says everything is going to be okay.
Make Ahead Magic
You can assemble the entire dish up to 24 hours in advance, cover it tightly, and keep it in the refrigerator until baking time. Just add an extra 5-10 minutes to the covered baking if it is coming straight from the fridge.
Freezing Instructions
Wrap the unbaked manicotti tightly in plastic then foil and freeze for up to 3 months. Thaw overnight in the refrigerator before baking, or bake frozen at 350°F for about 60-70 minutes covered, then uncover for the final cheese melting phase.
Serving Suggestions
A crisp green salad with bright vinaigrette cuts through all that rich cheese and meat sauce. Garlic bread is practically mandatory for sopping up the extra sauce, and a simple sautéed broccolini with lemon adds some fresh green to the plate.
- Let everyone know there will be a brief wait before serving because those first 10 minutes of resting make the difference between a neat slice and a messy slide
- The sauce actually tastes better the next day, so do not be afraid to make it ahead and let the flavors mingle
- Always make extra because the leftovers disappear mysteriously fast
 Pin It
 There is something deeply satisfying about pulling that foil off and seeing the cheese bubbling away, golden and perfect. This is the kind of recipe that turns an ordinary Tuesday into something worth remembering.
Recipe FAQs
- → Can I make manicotti ahead of time?
-
Absolutely. Assemble the entire dish up to 24 hours in advance, cover tightly, and refrigerate. Add 10-15 minutes to the baking time if baking cold from the refrigerator.
- → What's the easiest way to fill manicotti shells?
-
Use a piping bag fitted with a wide tip or a zip-top bag with the corner snipped off. This method keeps the process tidy and ensures each shell gets evenly filled without tearing.
- → Can I freeze leftovers?
-
Yes, freeze individual portions or the entire dish in an airtight container for up to 3 months. Thaw overnight in the refrigerator and reheat covered at 350°F until heated through.
- → What can I substitute for ground beef?
-
Ground turkey, chicken, or Italian sausage work beautifully. For a vegetarian option, omit the meat entirely and add sautéed mushrooms, spinach, or plant-based crumbles to the sauce.
- → Why do I cook the pasta less than package directions?
-
The manicotti continues cooking in the oven as it bakes. Undercooking by 1-2 minutes prevents the pasta from becoming mushy and ensures perfectly tender texture after baking.
- → Can I use no-boil manicotti shells?
-
Yes, no-boil shells work well. Skip the boiling step and fill them directly. The sauce provides enough moisture for them to cook properly during baking.
