 Pin It
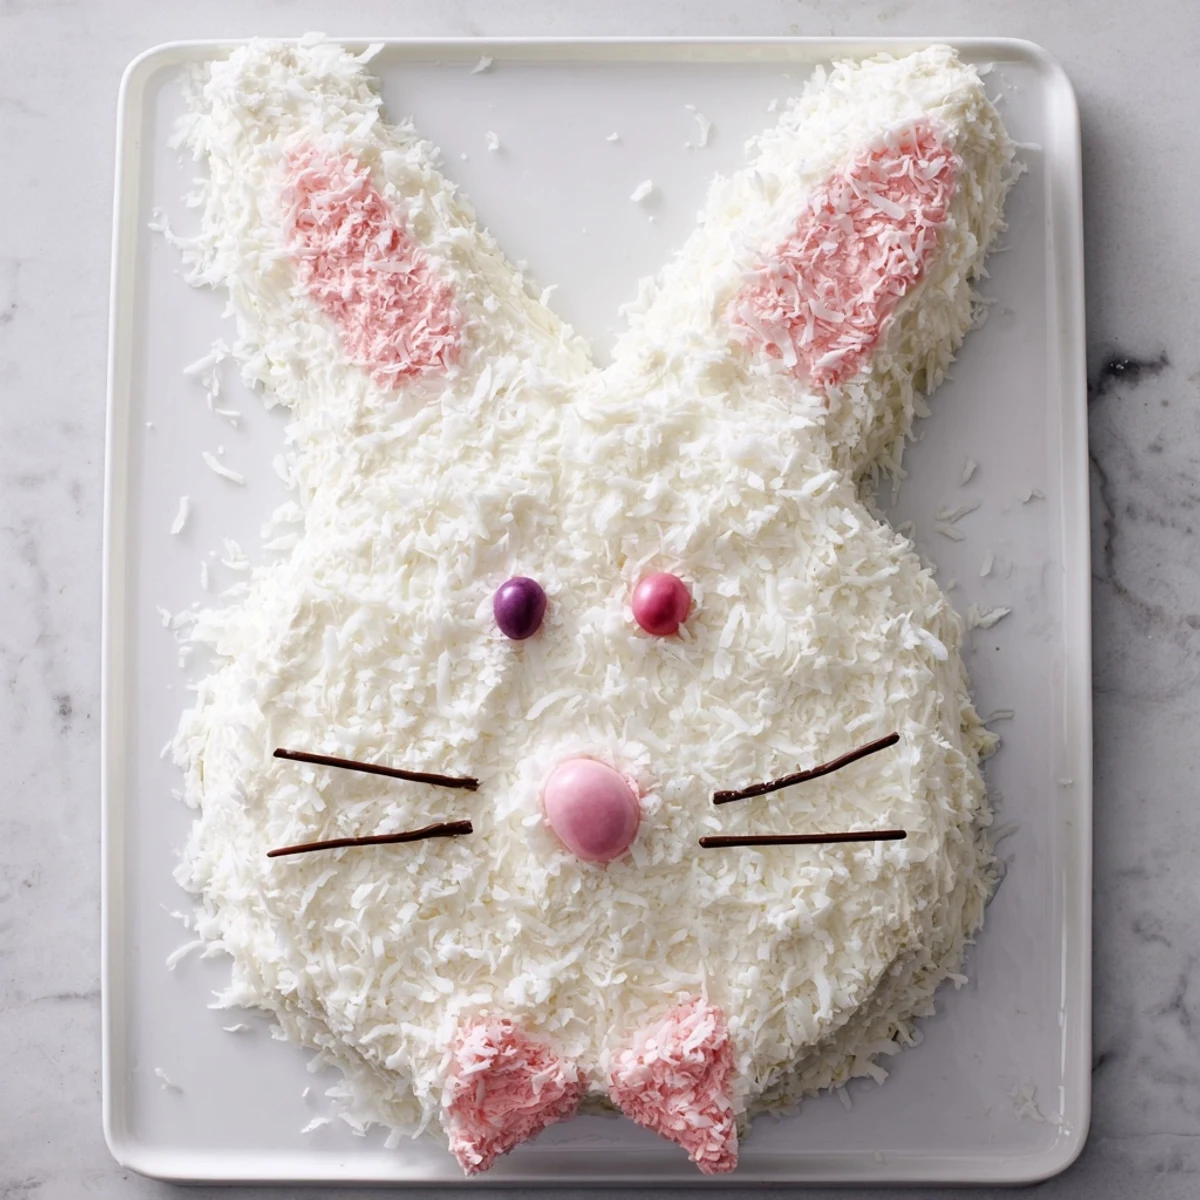
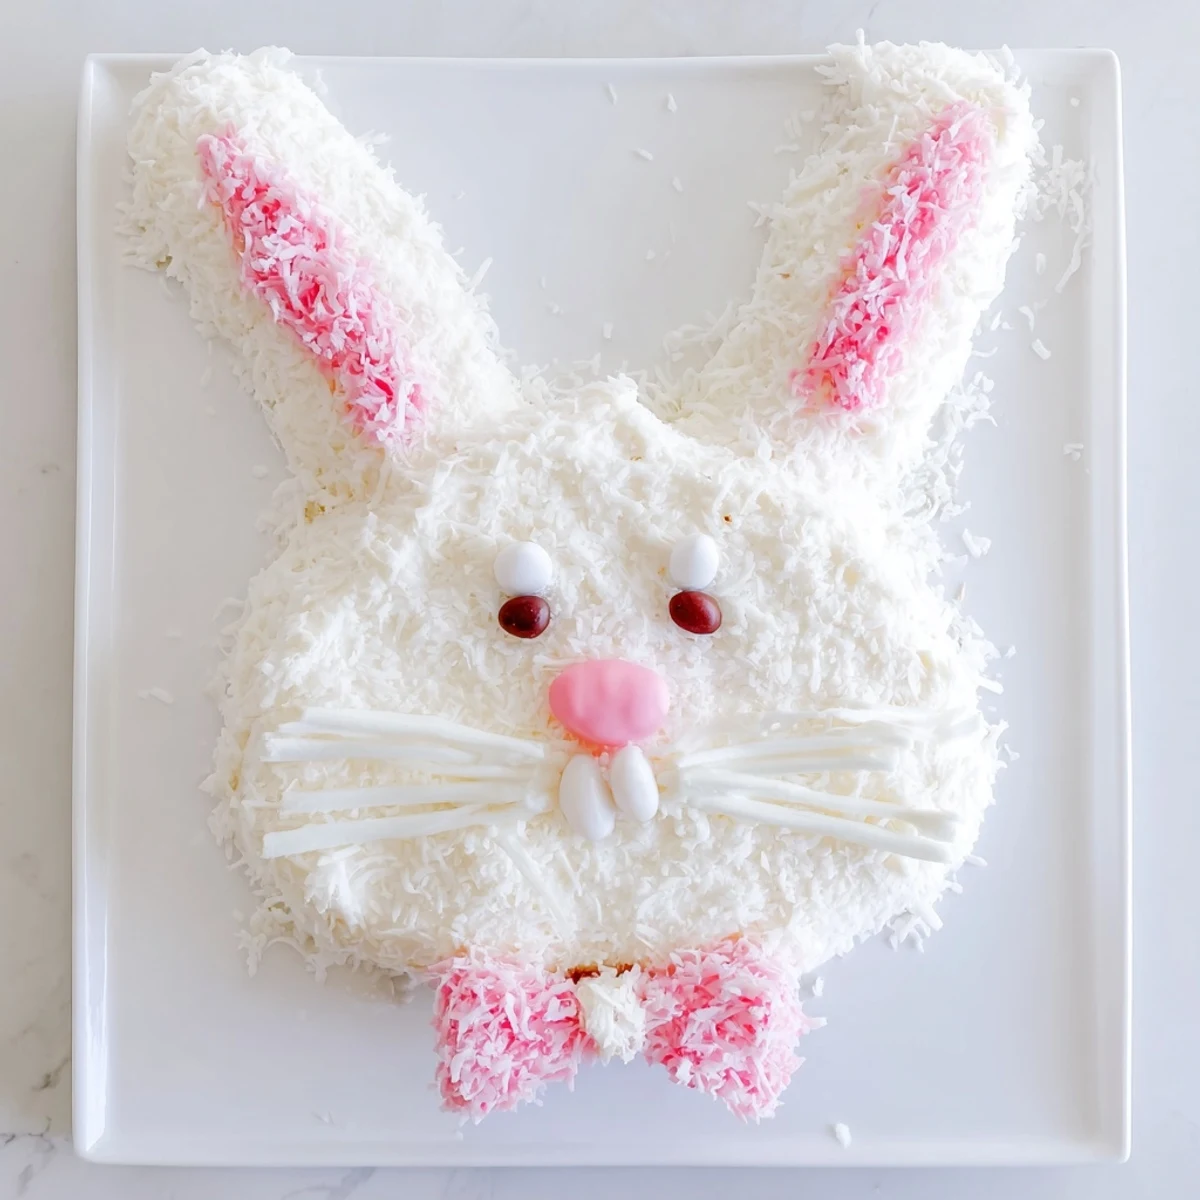
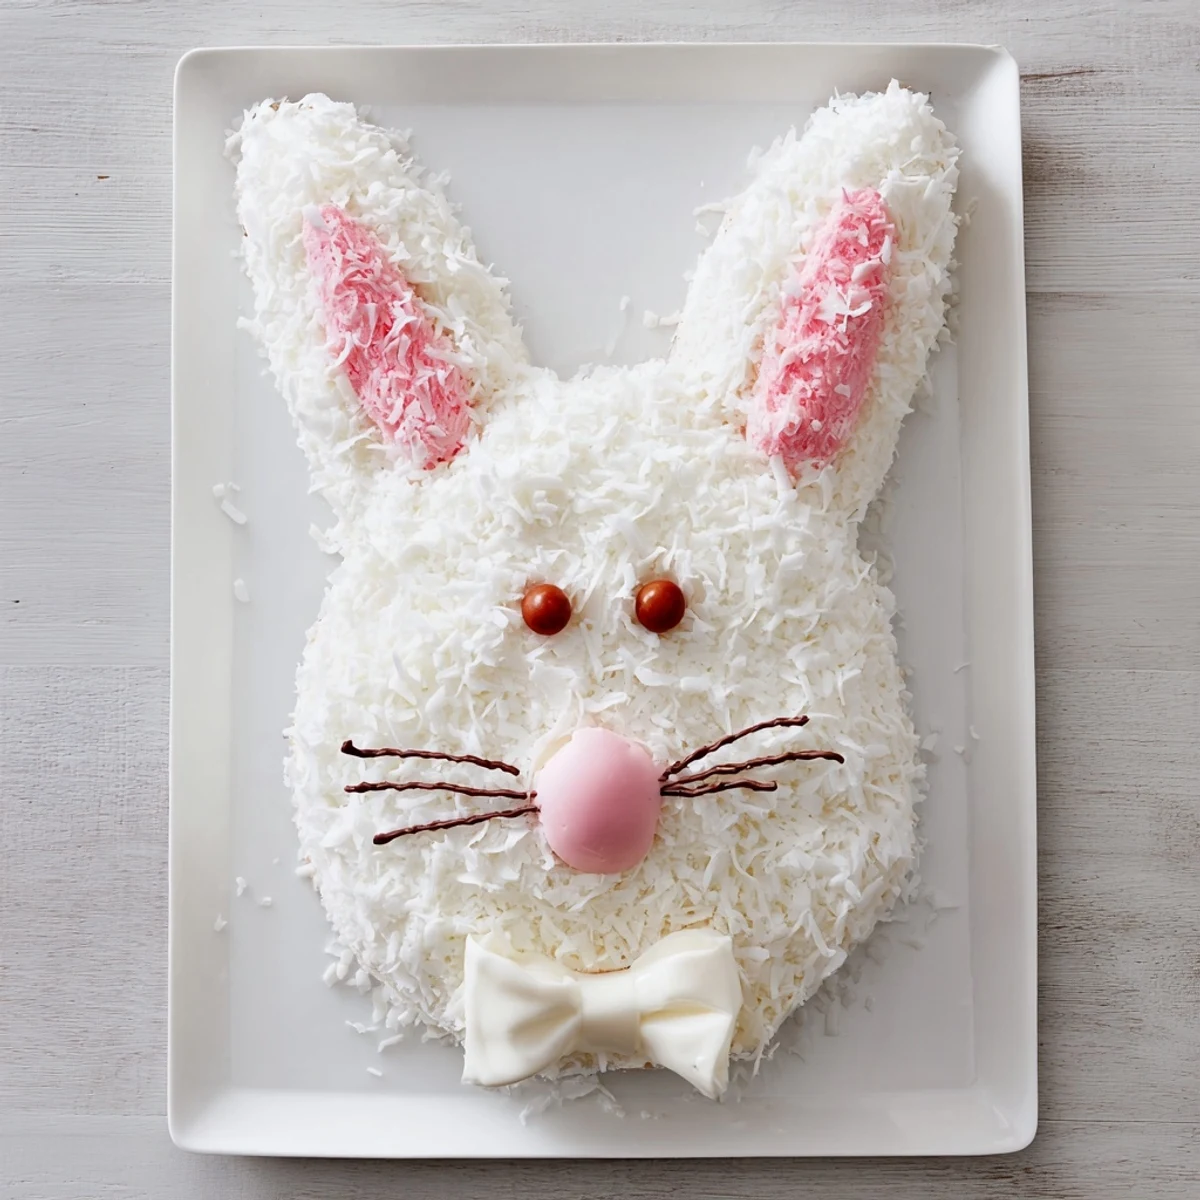
 This charming bunny-shaped dessert brings whimsy to any spring celebration. A moist vanilla cake base is generously coated in fluffy buttercream frosting, then covered with shredded coconut to create a soft, fur-like texture. The creative assembly uses one round cake for the face while a second is cut into playful ear and bow tie shapes. Pink-tinted coconut adds detail to the inner ears, while jelly beans and fondant bring the bunny to life with cute facial features. The entire project comes together in about an hour, making it an achievable yet impressive centerpiece for Easter brunch, spring birthday parties, or any festive occasion. Children and adults alike will delight in helping decorate this sweet, coconut-covered creation.
Last Easter, my daughter grabbed my hand and begged me to make something that would make everyone smile. We sat down together and flipped through cookbooks until we found a bunny cake that looked like it had hopped straight out of a storybook. The whole process became the highlight of our weekend.
I remember balancing the coconut covered ear pieces with one hand while my daughter dotted pink frosting with the other. She decided our bunny needed polka dots on the bow tie and honestly she was right. The photo of that cake still lives on my refrigerator door.
Ingredients
- 2¼ cups (280 g) all-purpose flour: The foundation of the cake. Measure by spooning flour into your measuring cup and leveling off for accuracy.
- 1½ tsp baking powder: Gives the cake its rise. Make sure its fresh and not expired for the best lift.
- ½ tsp baking soda: Works with the baking powder for a tender crumb that never feels dense.
- ½ tsp salt: Enhances all the flavors and balances the sweetness of the frosting.
- 1 cup (200 g) granulated sugar: Sweetens the cake while keeping it tender. Cream it thoroughly with butter for that perfect texture.
- ½ cup (115 g) unsalted butter softened: Room temperature butter creates a light fluffy base. Soften it properly but never microwave until melted.
- 3 large eggs: Bring these to room temperature too so they incorporate smoothly into the batter.
- 1 cup (240 ml) whole milk: Adds moisture and richness. The fat content makes a noticeable difference in texture.
- 2 tsp vanilla extract: Pure vanilla extract gives the best warm aromatic flavor that makes the house smell amazing while baking.
- 1 cup (225 g) unsalted butter softened: The base of your buttercream. Room temperature butter whips up silky smooth without air pockets.
- 4 cups (480 g) powdered sugar sifted: Sifting prevents lumps and makes the frosting impossibly creamy.
- 2–3 tbsp (30–45 ml) milk: Adjust this amount to get the perfect spreadable consistency.
- 1 tsp vanilla extract: Another dose of vanilla in the frosting ties everything together beautifully.
- Pinch of salt: Just a tiny bit cuts through the sweetness and makes the frosting taste more balanced.
- 2 cups (140 g) shredded sweetened coconut: Creates that fluffy bunny fur texture. Sweetened coconut works best for the classic look.
- Pink food coloring: Gel coloring gives the most vibrant pink without thinning out the coconut or frosting.
- Jelly beans or mini candies: These become the eyes and nose. Pick colors that pop against the white coconut.
- Pink and white fondant or marshmallows: For the ears. Fondant holds its shape better but marshmallows are easier for kids to handle.
Instructions
- Preheat and prep the pans:
- Set your oven to 350°F (175°C) and generously grease two 8-inch round pans with butter then dust with flour. This extra step prevents any sticking and ensures clean edges.
- Whisk the dry ingredients:
- In a medium bowl combine flour baking powder baking soda and salt. Whisking them together now means everything distributes evenly in the batter.
- Cream the butter and sugar:
- Beat the butter and sugar on medium high speed for 3 to 4 minutes until pale and fluffy. This step incorporates air which makes the cake light and tender.
- Add eggs and vanilla:
- Beat in the eggs one at a time making sure each is fully incorporated before adding the next. Then mix in the vanilla until just combined.
- Combine wet and dry:
- Alternate adding the flour mixture and milk to the butter mixture starting and ending with the flour. Mix only until just combined to avoid tough cake.
- Bake the cakes:
- Divide the batter evenly between the prepared pans and bake for 22 to 25 minutes. The cake is done when a toothpick comes out clean or the tops spring back when touched.
- Cool completely:
- Let the cakes rest in their pans for 10 minutes then turn them onto wire racks. Wait until theyre completely cool before frosting or the buttercream will melt right off.
- Make the buttercream:
- Beat the butter until smooth then gradually add powdered sugar vanilla salt and 2 tablespoons of milk. Add more milk if needed until you reach a spreadable consistency.
- Shape the bunny pieces:
- Keep one cake round whole for the face. Cut the second cake into two long ovals for ears and shape the remaining center into a bow tie. Dont worry about perfection.
- Arrange the bunny:
- Place the face piece on your serving tray then position the ears above and the bow tie below. Step back and adjust until the shape looks right.
- Add the crumb coat:
- Spread a very thin layer of frosting over all the cake pieces to lock in the crumbs. Chill for 20 minutes so this layer sets firm.
- Apply final frosting and coconut:
- Frost the entire bunny with the remaining buttercream then gently press shredded coconut all over the surface. The coconut should stick thickly like fluffy fur.
- Create pink inner ears:
- Tint a small handful of coconut with a drop of pink food coloring and toss until evenly colored. Press this onto the inner sections of the ears.
- Add the finishing touches:
- Use fondant or marshmallows to define the ear details and place candies for the nose and eyes. Let your creativity guide the final expression.
 Pin It
 When we finally carried the bunny cake to the table everyone stopped mid conversation to take photos. My daughter beamed like she had personally invented Easter dessert. That moment of collective joy made every coconut crumb worth the cleanup.
Making It Ahead
The cake layers can be baked wrapped tightly and frozen for up to a month. Just thaw them in the refrigerator overnight before frosting and decorating. The buttercream also keeps well in the fridge for several days.
Serving Suggestions
Cut the cake with a sharp knife dipped in hot water to get clean slices through the coconut. Serve it alongside fresh berries or a glass of cold milk to balance the sweetness. It tastes even better the second day as the flavors meld.
Decoration Ideas
Let the coconut be your canvas. You can tint portions with different colors for a pastel rainbow bunny or add chocolate sprinkles for contrast.
- Use licorice strings for whiskers that stay in place
- Try different shaped candies for unique expressions
- Press coconut gently so it adheres without falling off
 Pin It
 This bunny cake has become our Easter tradition and I hope it brings the same joy to your table. Some desserts are meant to be admired and this is absolutely one of them.
Recipe FAQs
- → How far in advance can I make the bunny cake?
-
The cake layers can be baked and wrapped in plastic up to 2 days ahead. Once assembled and decorated, the bunny cake stays fresh at room temperature for 2 days or refrigerated for up to 4 days. Add final candy decorations just before serving for best appearance.
- → Can I use a different cake flavor?
-
Absolutely. Chocolate, lemon, or strawberry cake work wonderfully. The coconut fur and buttercream pair perfectly with most flavors. Just ensure your chosen cake is sturdy enough for cutting and shaping.
- → What if I don't have fondant for the ears?
-
Large marshmallows make excellent ears when cut in half diagonally. You can also use pink construction paper or cardboard wrapped in wax paper for non-edible decorative ears that are removed before serving.
- → How do I transport the bunny cake safely?
-
Assemble the bunny directly on your serving platter or a sturdy cake board. For transport, use a large, flat box with non-slip mat underneath. Drive carefully and avoid sudden stops. Refrigerate briefly before moving to help the frosting set.
- → Can I make this cake gluten-free?
-
Yes. Substitute a high-quality gluten-free flour blend for the all-purpose flour in a 1:1 ratio. Ensure all decorations, candies, and fondant are certified gluten-free. The texture will remain moist and delicious.
- → What's the best way to cut the second cake into ears and bow tie?
-
Use a sharp knife and cut slowly. Slice the round cake in half lengthwise to create two long ovals for ears. The remaining center section naturally forms a bow tie shape. Don't worry about perfect edges—frosting and coconut will hide any imperfections.
