 Pin It
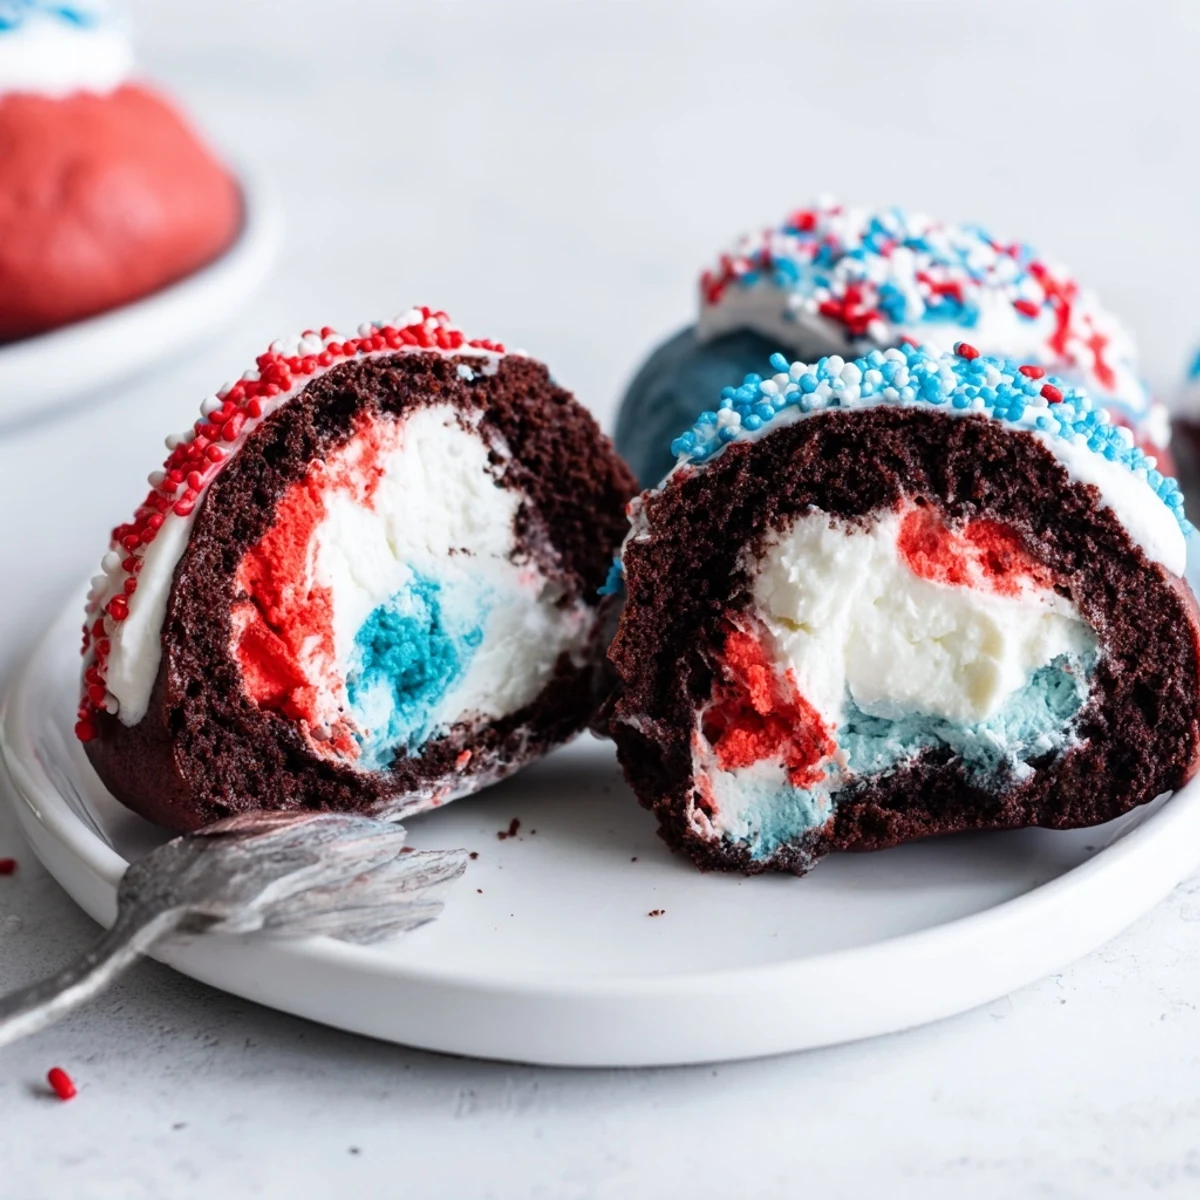
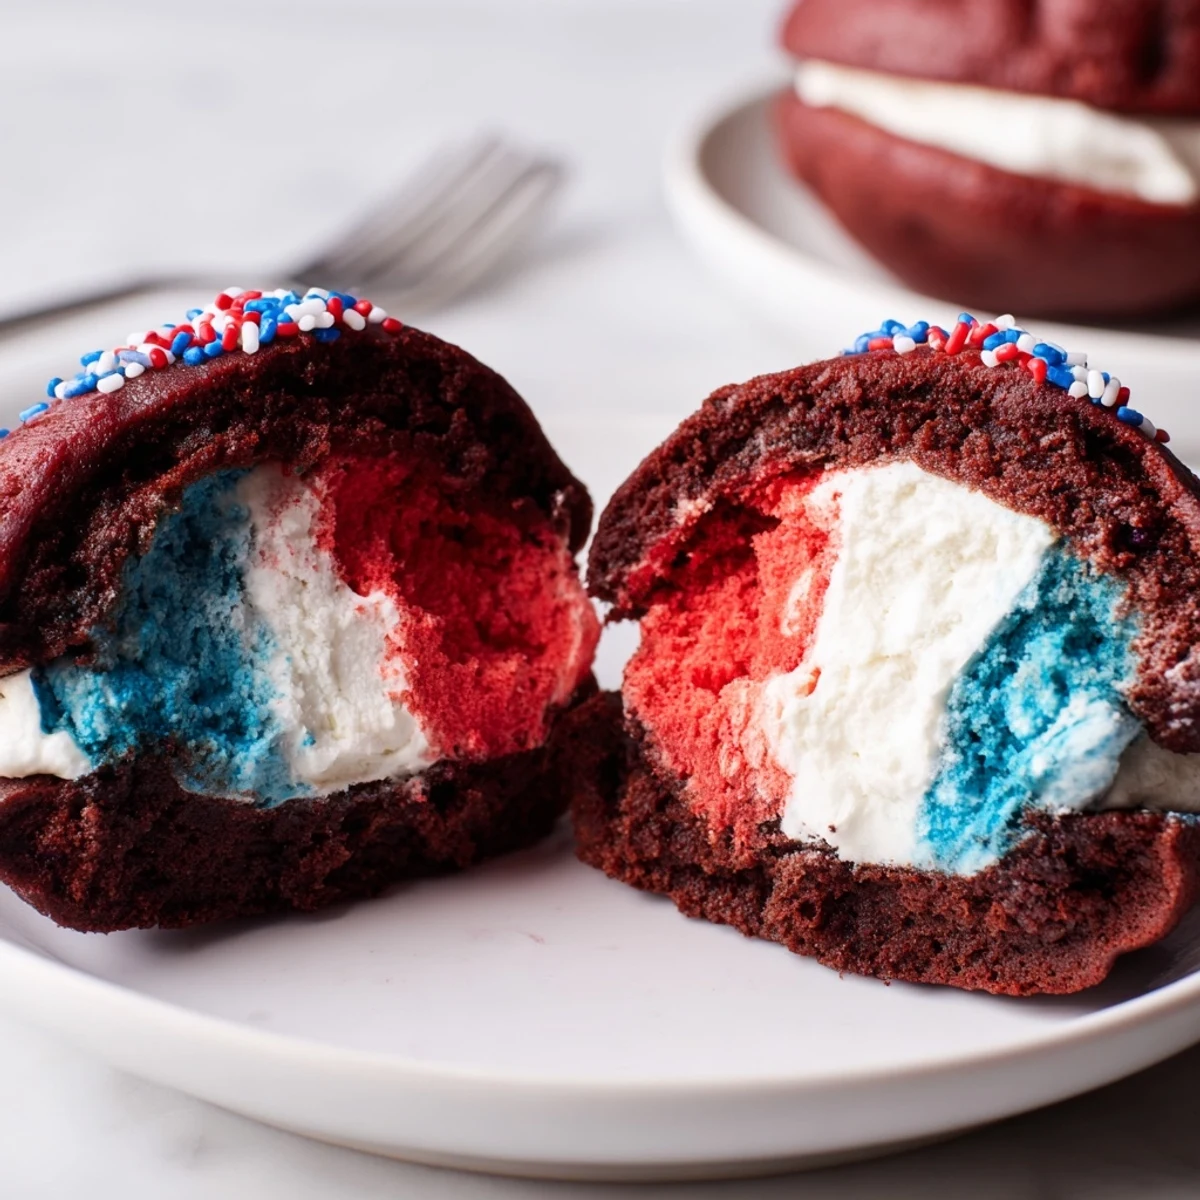
 Make soft cocoa rounds by combining flour, cocoa, baking soda and salt, then mixing into a butter, sugar, egg and buttermilk batter. Spoon 24 rounds and bake 10–12 minutes; cool completely. Whip butter, powdered sugar and marshmallow creme until light, divide and tint red, white and blue. Sandwich cakes, roll edges in sprinkles and chill 30 minutes for easier handling. Use gel color for vivid hues.
When I first brought a tray of these patriotic whoopie pies to a backyard barbecue, the colors practically sparkled in the sunlight and grabbed everyone's attention. There&aposs something undeniably cheerful about red, white, and blue treats lining the dessert table, especially as laughter and music fill the summer air. The soft, chocolatey cakes and swirled frosting reminded me of carefree July afternoons, eagerly hunting for the best-looking sweet. Baking these has become my favorite kind of holiday tradition: relaxed, creative, and full of sneaked tastes.
Last Memorial Day, my niece offered to help and managed to cover half the kitchen in sprinkles; her giggles made the sticky cleanup absolutely worth it. The two of us chatted about firework shows and whoopie pie flavor experiments as we worked, turning a simple baking session into a highlight of the weekend. By the time we finished, our fingers were rainbow-hued and our spirits lifted, thanks to the sheer fun of making something so celebratory. These whoopie pies hold memories of messy aprons and shared stories more than anything.
Ingredients
- All-purpose flour: Choose a reliable brand for cakes that rise just right and avoid heavy-handed scooping for fluffier cookies.
- Unsweetened cocoa powder: Good cocoa gives these pies their deep flavor – Dutch-processed if you want even more chocolate punch.
- Baking soda: This ensures the perfect cake lift; make sure yours is fresh.
- Salt: A small pinch makes every flavor pop, learned after once forgetting it and regretting the bland first bite.
- Granulated sugar: A moderate amount keeps things balanced and not overly sweet.
- Unsalted butter: Softened to room temp so it creams effortlessly, leaving the cakes tender rather than dense.
- Egg: Adds just the right richness and structure; let it come to room temperature for easier blending.
- Buttermilk: This secret ingredient gives the cakes their signature slight tang and wonderful softness, especially if warmed ever so slightly.
- Vanilla extract: Always opt for real vanilla to bring warmth to both the cake and filling.
- Powdered sugar: Essential for a smooth, fluffy filling – sifting helps avoid pesky lumps.
- Marshmallow creme: Delivers the gooey texture that makes each bite nostalgic, though it can be sticky to work with, so use a silicone spatula.
- Red food coloring: Gel types produce those bold shades with less mess than liquid coloring.
- Blue food coloring: A little goes a long way to create a vivid blue; blend well for an even tone.
- Patriotic sprinkles: These are non-negotiable for that final festive touch and a little crunch at the edges.
Instructions
- Set up your workspace:
- Preheat the oven to 350°F (175°C) and line two baking sheets with parchment paper – you&ll thank yourself for the speedy cleanup later.
- Mix dry ingredients:
- In a medium bowl, whisk flour, cocoa powder, baking soda, and salt together until fully incorporated and the cocoa aroma wafts up.
- Cream butter and sugar:
- Beat softened butter and granulated sugar in a large bowl until pale and fluffy, then blend in the egg until glossy.
- Combine wet and dry:
- Add buttermilk and vanilla, then mix in the dry ingredients slowly – I like to listen for that satisfying soft batter plop as it comes together.
- Shape the cakes:
- Using a cookie scoop or spoon, drop 24 even mounds on the lined sheets, spacing them a couple inches apart for room to spread.
- Bake to perfection:
- Slide trays into the oven and bake 10–12 minutes; cakes should spring back when gently pressed and make the kitchen smell like fudge.
- Cool completely:
- Let cakes rest on the pans, then move to a cooling rack – they&re fragile when warm but firm up as they cool.
- Prepare the filling:
- Beat butter until creamy, then add powdered sugar, marshmallow creme, vanilla, and salt, mixing until billowy and light.
- Tint and swirl the frosting:
- Divide filling into three bowls: leave one plain, tint one bright red, and the other deep blue – swirling together on a spoon brings back finger-paint memories.
- Stuff the sandwiches:
- Pipe or spoon a cloud of filling onto the underside of half the cakes, then gently press the remaining cakes on top, creating perfect sandwiches.
- Add the flair:
- Roll edges in patriotic sprinkles or pipe a touch of colored frosting on top for extra glory and sparkle.
 Pin It
 The first time I brought a platter of these to a neighbor&aposs July 4th bash, the pies disappeared faster than anything else. It wasn&apost just the taste – people kept coming back for the playful look and the excuse to get a little frosting on their nose, just for the laughs. Sharing these made me feel like I was passing around pure joy with every bite. That&aposs the kind of magic this recipe brings to a table.
Making It Your Own
One of my favorite discoveries is how easily these whoopie pies invite creativity – a dash of instant espresso in the batter makes the chocolate deeper, while a drop of lemon extract in the filling gives a zingy twist. You can play with sprinkles, swap the food coloring for natural powders, or even miniaturize them for little hands. Baking together always sparks new ideas, and it&aposs half the fun making each batch unique for the occasion.
Troubleshooting Common Glitches
If your cakes turn out flat, it&aposs likely a mixing mishap or over-measured flour, but the filling still saves even the wonkiest pie. Sometimes the filling feels too runny on a hot day – just pop it in the fridge for ten minutes and it thickens right up. Whenever sprinkles roll off the edges, I just give them a gentle press and suddenly everything sticks as it should. Every batch teaches something new, and the joy is in embracing the imperfections.
Party Prep & Serving Hacks
On big summer days, I bake the chocolate cakes the night before and keep them sealed tight until I'm ready to fill and decorate. Letting the assembled pies chill in the fridge for half an hour makes handling and serving a breeze – they set up and hold together perfectly outside. If you&aposre making these with kids, lay a sheet under your workspace to catch stray sprinkles and make cleanup easy.
- Always let the whoopie pies sit at room temp a few minutes before serving for the softest bite.
- Transport them in cupcake carriers to keep everything neat and festive on the go.
- Wipe your knife after each cut for clean halves if you&aposre serving a crowd.
 Pin It
 May your next holiday celebrate not just the occasion, but the smiles from every gooey, colorful bite. These whoopie pies have a way of making any summer day even sweeter.
Recipe FAQs
- → How do I keep the cakes soft and cakey?
-
Use buttermilk and avoid overmixing once the dry ingredients are added; gentle mixing keeps the crumb tender. Bake until set and springy, then cool on a rack to retain moisture.
- → What gives the filling a stable, fluffy texture?
-
Beat the butter until creamy before adding powdered sugar and marshmallow creme. Cold butter takes longer—start with softened butter and whip until light and fluffy for a stable, pipeable filling.
- → How can I achieve vibrant red and blue colors?
-
Use gel or paste food coloring instead of liquid to maintain filling consistency and produce more intense, concentrated hues without thinning the buttercream.
- → Can these be made gluten-free or dairy-free?
-
Substitute a 1:1 gluten-free flour blend for the flour. For dairy-free, use plant-based butter and a non-dairy milk curdled with a splash of vinegar; check marshmallow creme labels for non-dairy options.
- → What's the best way to assemble and finish the edges?
-
Pipe or spoon an even layer of filling onto the flat side of half the cakes, top with the remaining halves, then roll the edges in sprinkles or pipe additional frosting for a neat finish.
- → Can I make these ahead of time and how should I store them?
-
Assemble and chill for 30 minutes to firm up the filling, then store in an airtight container in the fridge for up to 3 days. Bring to room temperature before serving for best texture.
