 Pin It
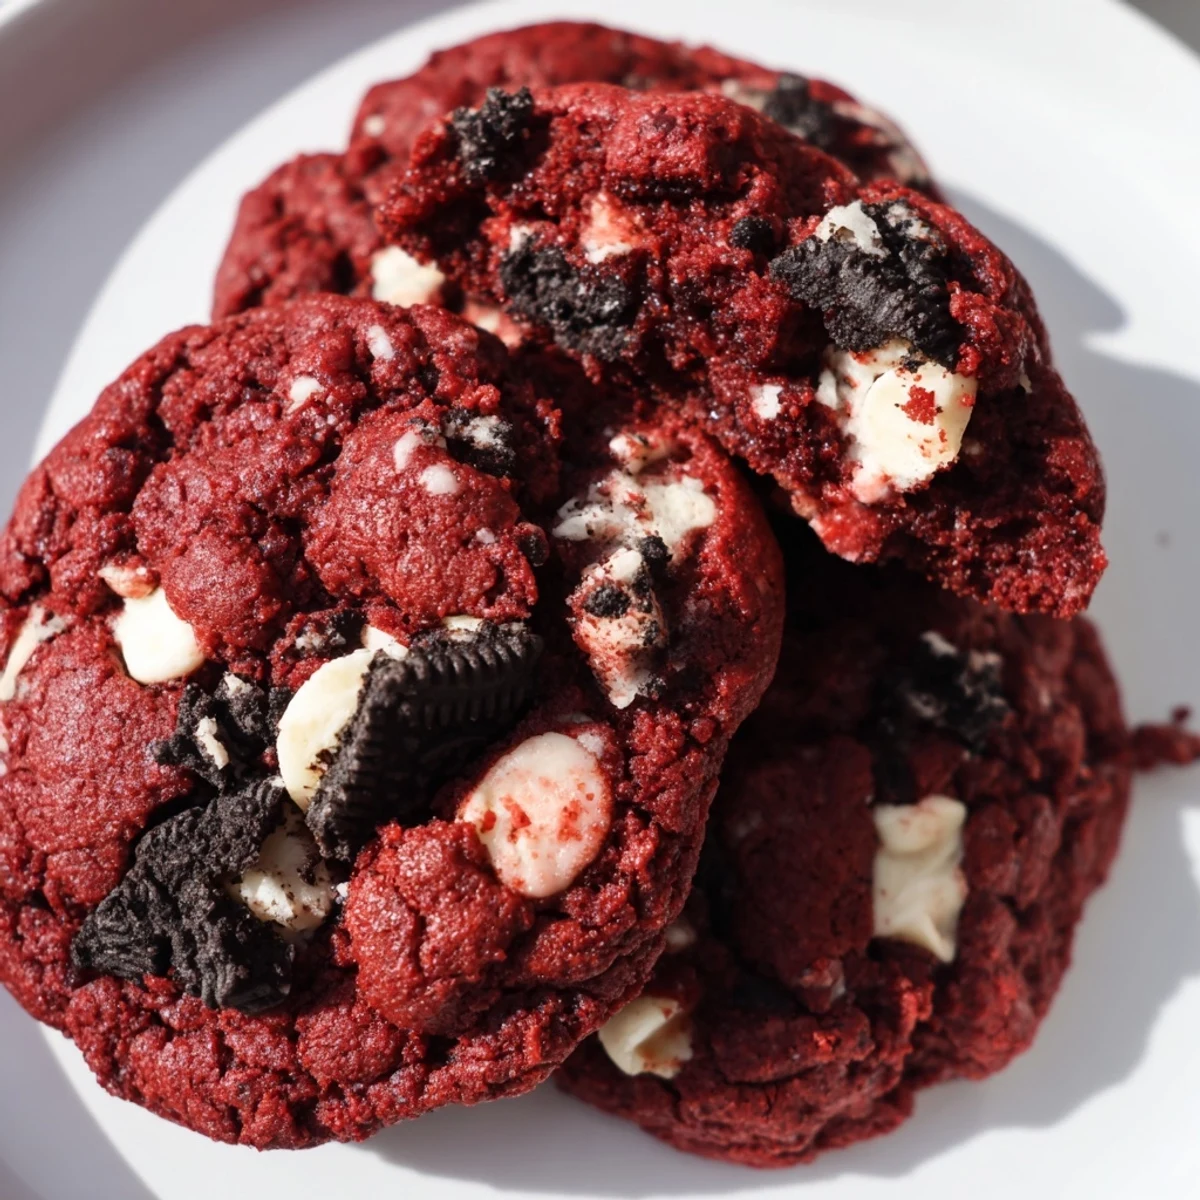
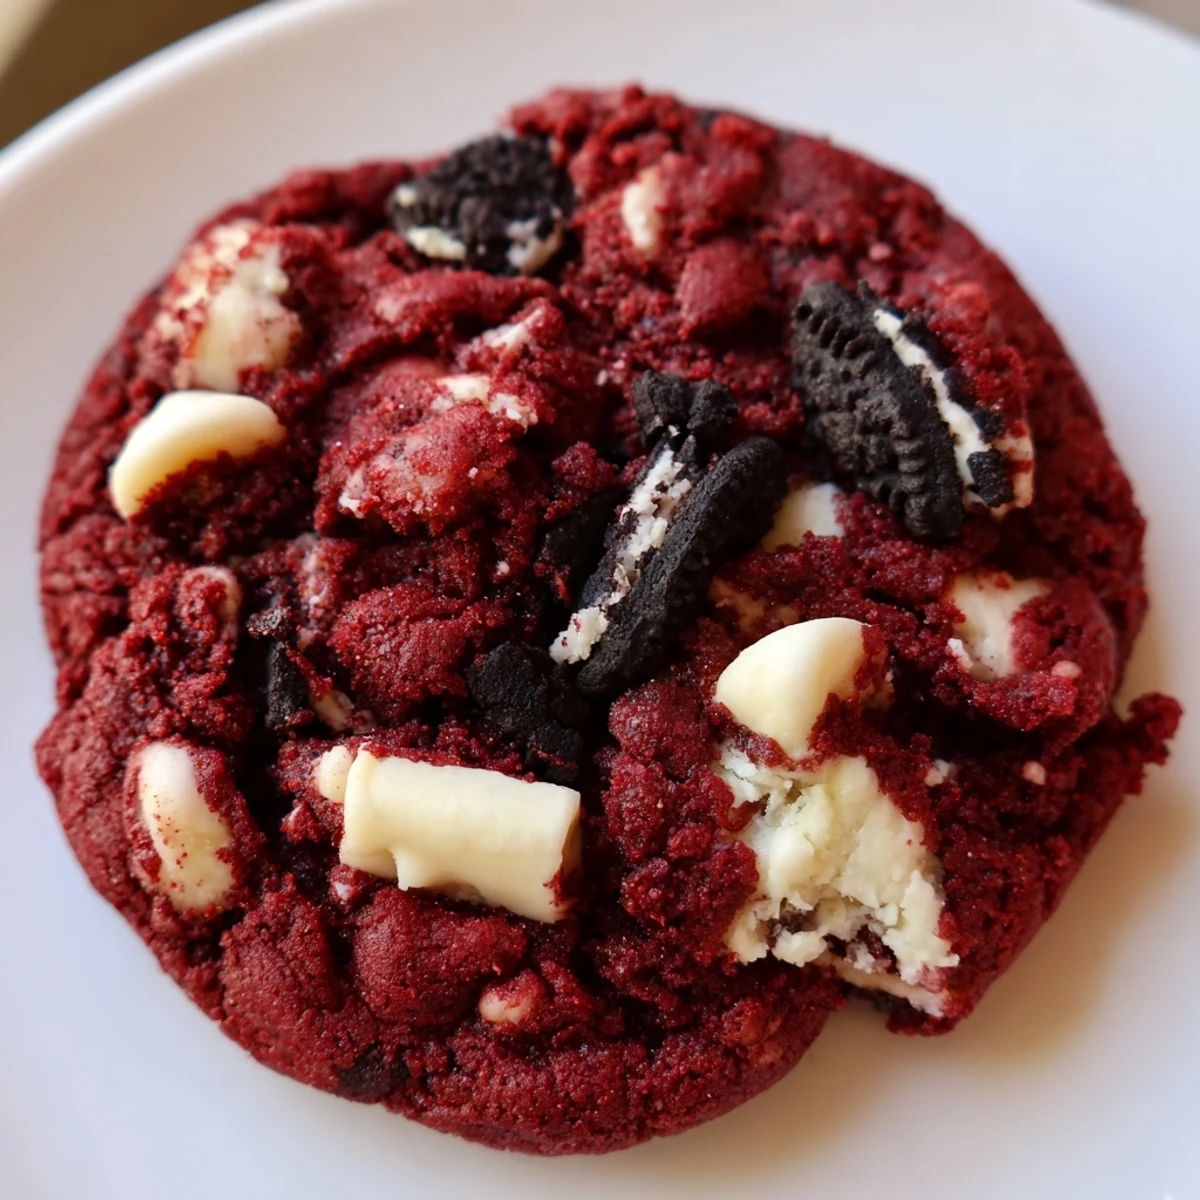
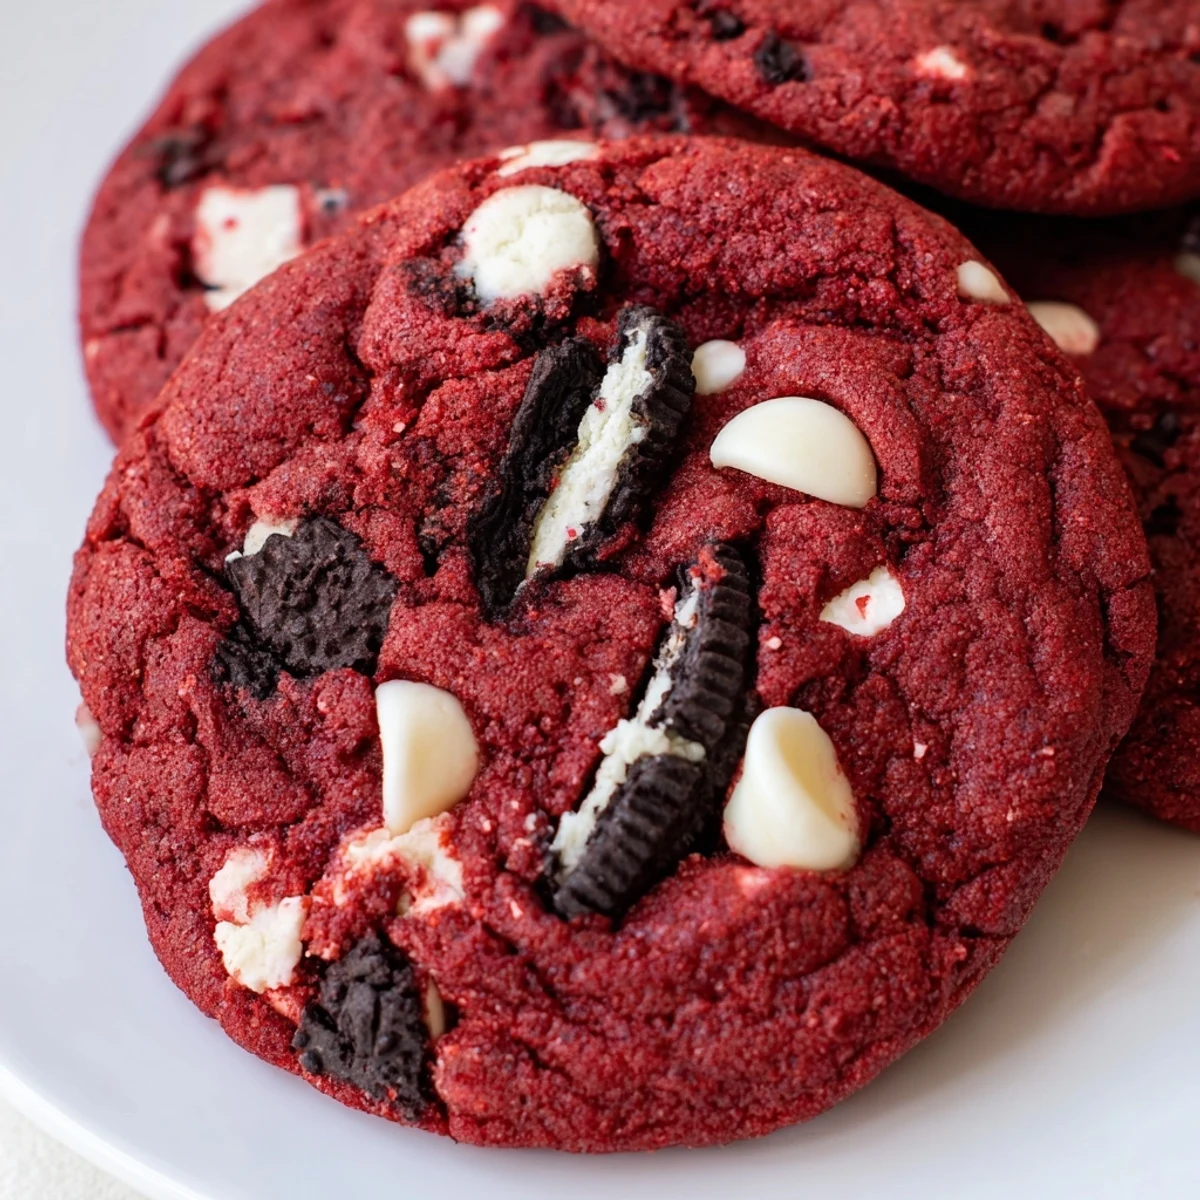
 These soft red velvet cookies combine rich cocoa flavor with sweet white chocolate chips and crunchy chopped Oreos. The dough comes together quickly with basic pantry ingredients, requiring just 20 minutes of prep before a short 12-minute bake. Each cookie delivers a satisfying chew with pockets of creamy white chocolate and that classic cookies-and-cream crunch everyone loves.
The vibrant red color makes these perfect for holidays, Valentine's Day, or anytime you want to impress. Store them in an airtight container and they'll stay fresh for up to five days—though they rarely last that long!
The first time I made these red velvet Oreo cookies, my kitchen looked like a crime scene with red food coloring splattered everywhere. My roommate walked in, stopped dead in her tracks, and asked if I was making cookies or conducting a science experiment. But one bite later, we were both sitting on the floor ignoring the mess and reaching for seconds.
I brought a batch to my friend's Valentine's Day party last year, and honestly they were gone in under ten minutes. People kept asking where I bought them, and when I said homemade, someone actually asked for the recipe right then and there on a cocktail napkin.
Ingredients
- Allpurpose flour: This foundation needs to be measured properly so dont scoop directly from the bag or your cookies will turn out dense
- Unsweetened cocoa powder: A little goes a long way to give that classic red velvet flavor without overpowering the sweetness
- Baking soda: This is what creates those beautiful cracks on top and gives the cookies their perfect rise
- Salt: Essential for balancing all the sugar and enhancing the chocolate notes
- Unsalted butter: Room temperature is nonnegotiable here so it cream properly with the sugars
- Light brown sugar: The molasses in brown sugar keeps these cookies incredibly soft and chewy for days
- Granulated sugar: Creates crisp edges while the brown sugar handles the chewy centers
- Egg and egg yolk: The extra yolk adds richness and helps maintain that perfect soft texture
- Vanilla extract: Pure vanilla makes all the difference in elevating the overall flavor
- Milk: Just enough to bring everything together without making the dough too sticky
- Red food coloring: Gel coloring gives you that vibrant red without needing to use half the bottle
- White chocolate chips: These melt slightly and create these creamy pockets throughout the cookie
- Oreo cookies: Roughly chopped so you get big satisfying chunks and smaller crumbs throughout
Instructions
- Preheat your oven:
- Get that oven to 350°F and line your baking sheets with parchment paper because nobody has time for scrubbing cookie sheets later
- Whisk the dry ingredients:
- In a medium bowl combine the flour cocoa powder baking soda and salt until everything is evenly distributed
- Cream the butter and sugars:
- Beat the butter brown sugar and granulated sugar together for a solid 2 to 3 minutes until it looks light and fluffy
- Add the wet ingredients:
- Throw in the egg egg yolk vanilla milk and that gorgeous red food coloring and mix until the color is perfectly uniform
- Combine everything:
- Gradually mix in your dry ingredients but stop as soon as the flour disappears because overmixing makes tough cookies
- Fold in the goodies:
- Gently fold in those white chocolate chips and chopped Oreos being careful not to break them down too much
- Scoop the dough:
- Drop rounded balls onto your prepared sheets leaving about 2 inches between each one because they will spread
- Bake to perfection:
- Bake for 10 to 12 minutes until the edges look set but the centers still seem slightly underbaked
- Cool completely:
- Let them rest on the baking sheet for 5 minutes before moving them to a wire rack so they set up properly
 Pin It
 My niece now requests these for every birthday and holiday celebration. She even helped me make them last Christmas wearing an apron that was way too big and getting red food coloring all over her face.
Getting That Perfect Red Color
I learned the hard way that liquid food coloring just does not cut it for red velvet. The first time I made these with regular drops I ended up adding so much that the dough became this weird sticky mess. Gel coloring is concentrated so you get that deep vibrant red with just a tiny amount and your dough texture stays perfect.
Chopping The Oreos
Do not go too fine when you chop your Oreos or you will lose those satisfying chunks. I put them in a ziplock bag and give them a few whacks with a rolling pin or just chop them on a cutting board with a large knife. You want a mix of bigger pieces and smaller crumbs so every cookie has great texture variation.
Storing And Freezing
These cookies actually stay soft for days when stored in an airtight container at room temperature. I have also frozen the dough balls before baking and they turn out just as good plus you can have fresh baked cookies anytime the craving hits.
- Place a piece of white bread in the container with baked cookies to keep them extra soft
- If freezing dough scoop it onto a baking sheet first freeze the balls then transfer to a bag so they do not stick together
- Bake frozen dough balls for just 1 to 2 minutes longer than the recipe calls for
 Pin It
 Every time I make these now I remember that chaotic first attempt and smile because some of the best recipes come from messy kitchen experiments.
Recipe FAQs
- → Why did my red velvet cookies turn out brown instead of red?
-
The natural cocoa powder can darken the red hue. Using gel food coloring instead of liquid will give you a more vibrant red color. You may need to add slightly more gel coloring than the recipe calls for to achieve that classic red velvet shade.
- → Can I freeze the cookie dough?
-
Yes, scoop the dough into balls and freeze on a baking sheet until firm, then transfer to a freezer bag. They'll keep for up to 3 months. Bake from frozen, adding 1-2 extra minutes to the baking time.
- → Why are my cookies flat?
-
Make sure your butter is softened but not melted. Also, chilling the dough for 30 minutes before baking can help prevent spreading. Measure your flour correctly—too little flour can cause cookies to spread excessively.
- → Can I use natural cocoa powder instead of Dutch-processed?
-
Absolutely. Natural cocoa powder will work fine in this recipe. The flavor will be slightly more intense and the cookies may bake up a bit lighter in color, but the texture and overall taste will remain delicious.
- → How do I know when the cookies are done?
-
The edges should look set and slightly firm, while the centers still appear slightly underbaked and soft. They'll continue cooking on the hot baking sheet during the 5-minute cooling time, resulting in perfectly chewy cookies.
- → Can I substitute the Oreos with another cookie?
-
Yes! Chocolate sandwich cookies, broken waffle cones, or even crushed graham crackers would work well. Just keep the total mix-in quantity around 1.5 cups for the best texture balance.
