 Pin It
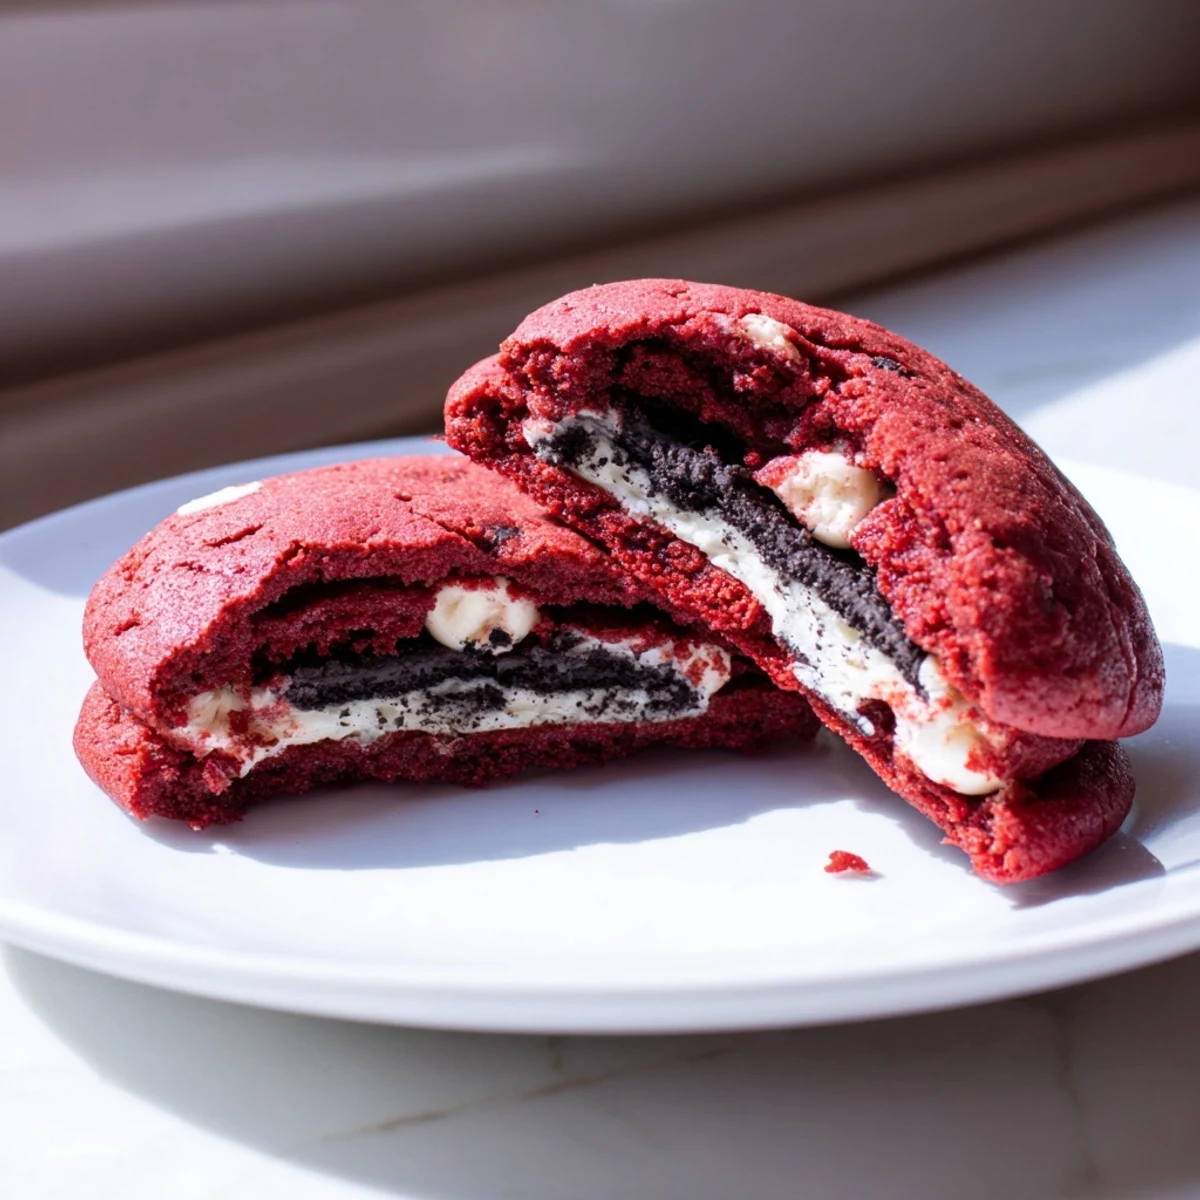
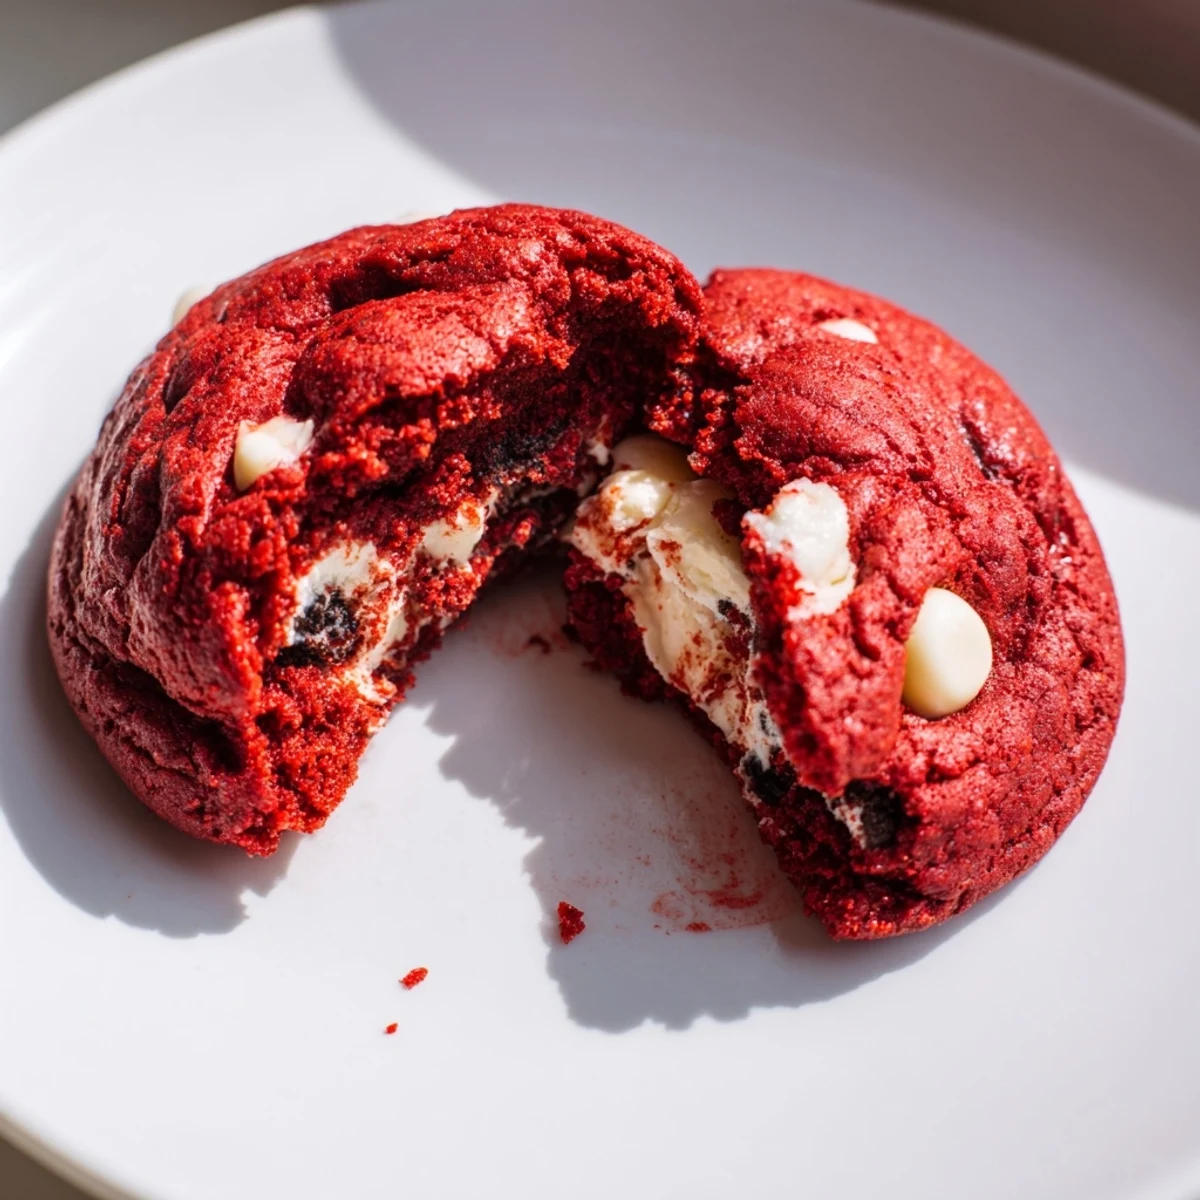
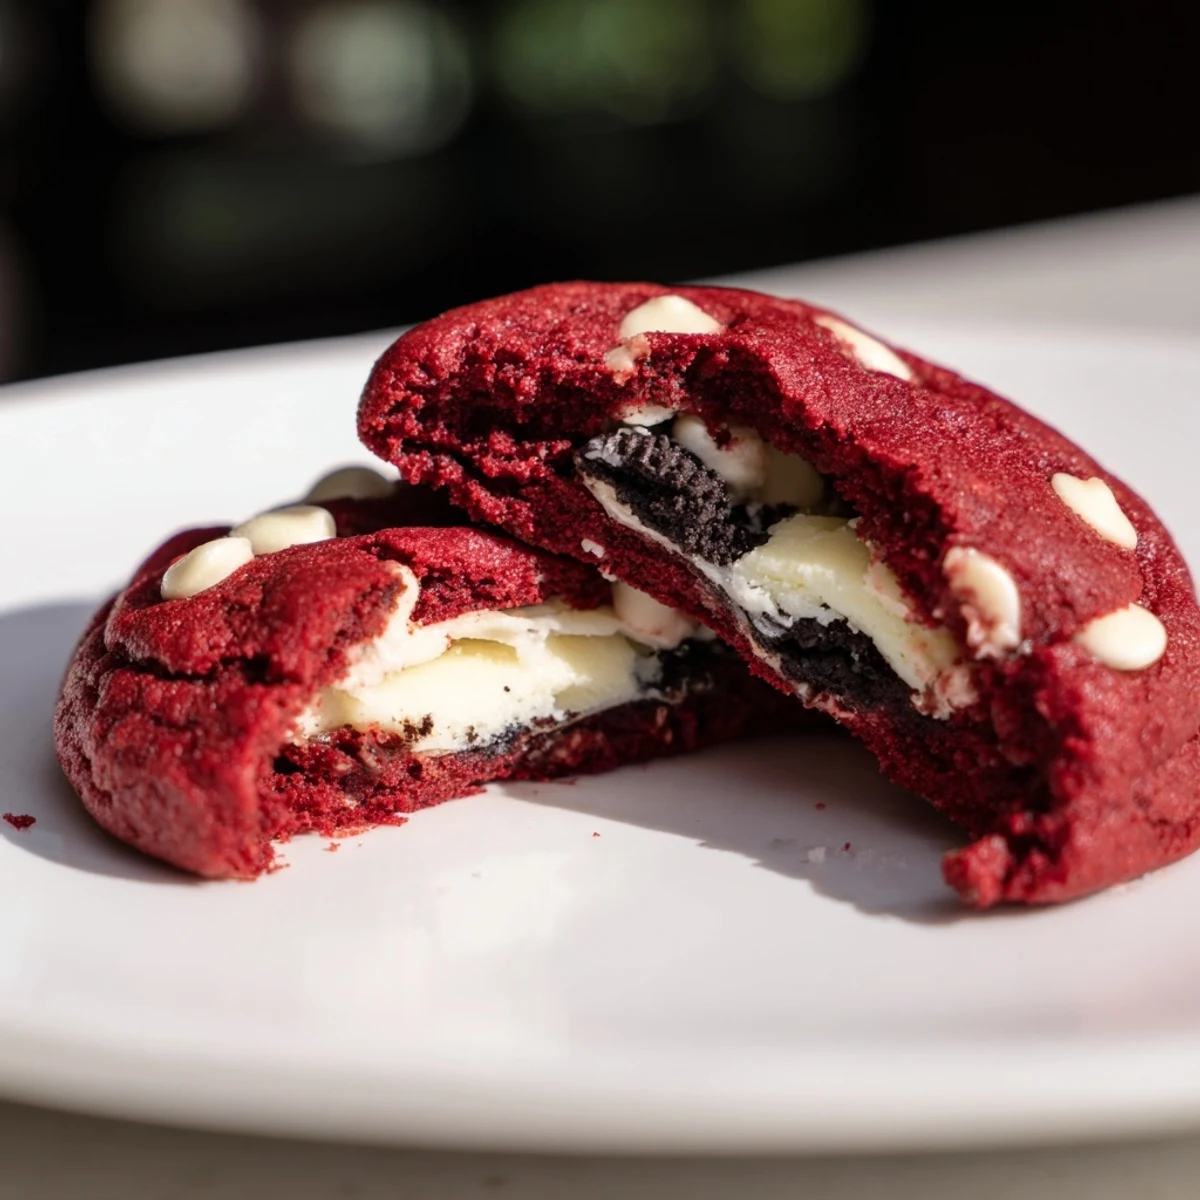
 These stunning red velvet cookies combine the classic cocoa flavor and vibrant color of red velvet with the irresistible crunch of Oreo cookies. The dough features unsweetened cocoa powder, white chocolate chips, and just the right amount of red food coloring for that signature look. Each cookie is hand-stuffed with a homemade cream cheese filling blended with crushed Oreos, creating a surprise center that oozes with creamy goodness when baked. The result is a soft, chewy exterior with a rich, decadent filling that perfectly balances sweet and creamy flavors.
The kitchen counter was covered in a light dusting of red cocoa powder, looking like something exploded in a festive way. My roommate walked in, stopped mid sentence, and simply asked 'Are we having a Valentine's Day emergency or just Tuesday?' Neither, actually. I'd seen these stuffed red velvet cookies somewhere online and couldn't get the concept out of my head—a whole Oreo cream filling tucked inside a red velvet cookie, like a surprise party in dessert form.
First batch I made, I got impatient and tried stuffing the filling into room temperature dough. Big mistake—the dough stuck to everything, my fingers turned permanently pink, and half the fillings ended up oozing out during baking. Learned my lesson: chill the filling first, work quickly, and embrace the mess because red food coloring stains everything it touches.
Ingredients
- 2 cups all-purpose flour: The foundation that gives these cookies their structure, and dont pack it down when measuring
- 1/4 cup unsweetened cocoa powder: This isnt chocolate cake territory—we want that subtle cocoa background note that makes red velvet distinctive
- 1 tsp baking soda: Provides the lift for those puffy centers while keeping edges chewy
- 1/2 tsp salt: Balances the sweetness and intensifies the cocoa flavor
- 1/2 cup unsalted butter, softened: Room temperature is non-negotiable here—cold butter creates weird pockets of melted chaos
- 3/4 cup granulated sugar: Creates that crackly exterior we all want on our cookies
- 1/2 cup packed light brown sugar: Adds moisture and a subtle caramel note that plays beautifully with white chocolate
- 1 large egg: The binder that brings everything together into a cohesive dough
- 1 tbsp milk: Just enough moisture to counteract the cocoa powder's drying effects
- 2 tsp vanilla extract: Don't skimp here—vanilla makes red velvet taste like itself
- 1 tbsp red food coloring: Gel coloring gives you that vibrant red with less liquid, but liquid works too
- 1 cup white chocolate chips: The creamy, mellow sweetness that keeps these cookies from becoming too intense
- 4 oz cream cheese, softened: The backbone of that classic Oreo cream filling flavor
- 2 tbsp unsalted butter, softened: Makes the filling spreadable and smooth
- 1 1/4 cups powdered sugar, sifted: Sifting prevents those dreaded powdered sugar lumps in your creamy filling
- 1/2 tsp vanilla extract: Pure vanilla in the filling makes it taste professionally made
- 8 Oreo cookies, finely crushed: The magic twist that makes this filling something extraordinary
Instructions
- Preheat and prep your workspace:
- Heat your oven to 350°F and line two baking sheets with parchment paper—this step prevents heartbreak later
- Mix the dry ingredients:
- Whisk together flour, cocoa powder, baking soda, and salt in a medium bowl until uniformly colored
- Cream your butter and sugars:
- Beat butter, granulated sugar, and brown sugar until the mixture looks pale and fluffy, about 2 minutes of serious mixing
- Add the wet ingredients:
- Pour in egg, milk, vanilla, and red food coloring, mixing until the batter turns a shocking pink-red color
- Combine everything:
- Gradually add dry ingredients to the wet mixture, mixing just until flour streaks disappear, then fold in white chocolate chips
- Make the Oreo filling:
- In a separate bowl, beat cream cheese and butter until completely smooth, then add powdered sugar and vanilla until creamy
- Add cookie crunch to filling:
- Fold crushed Oreos into the cream cheese mixture, then refrigerate for 10 minutes until firm enough to handle
- Stuff the cookies:
- Scoop 2 tablespoons of dough, flatten slightly, place 1 teaspoon of chilled filling in center, then fold dough around it sealing completely
- Bake to perfection:
- Place dough balls 2 inches apart on prepared sheets and bake 11-12 minutes until edges are set but centers still look soft
- Cool completely:
- Let cookies rest on baking sheet for 5 minutes before moving to wire rack—the filling needs this time to set up properly
 Pin It
 My sister claimed she didn't like red velvet until she tried one of these warm from the oven. She took one bite, eyes went wide, and immediately asked how many I could make for her upcoming birthday. Now they're her annual request, and I've learned to double the batch because they disappear faster than expected at any gathering.
Make Ahead Magic
You can scoop the dough balls and freeze them raw, then bake straight from frozen—just add 2 minutes to the baking time. The filling also keeps in the refrigerator for up to a week if you want to prep that part in advance and assemble cookies fresh when needed.
Troubleshooting Texture
If your cookies spread too much, your butter was probably too soft or your oven runs slightly cool—try refrigerating the stuffed dough balls for 15 minutes before baking. For cookies that seem too thick and cakey, you might have overmeasured the flour or mixed the dough too long after adding the dry ingredients.
Serving Suggestions
These cookies are showstoppers on their own, but a light dusting of powdered sugar right before serving makes them look bakery beautiful. I've also crumbled them over vanilla ice cream for an over-the-top sundae situation that nobody complains about.
- Pair with cold milk or coffee to cut through the richness
- Stack them in clear treat bags tied with red ribbon for effortless gifting
- Room temperature is when the filling and cookie texture are at their absolute best
 Pin It
 Something magical happens when you bite through that chewy red velvet exterior and hit the cool, creamy Oreo center—its the kind of cookie that makes people pause midconversation and ask what exactly they're eating.
Recipe FAQs
- → How do I prevent the filling from leaking during baking?
-
Chill the Oreo cream filling for at least 10 minutes before stuffing the cookies. Make sure to seal the dough completely around the filling, pinching edges together firmly. Place dough balls seam-side down on the baking sheet.
- → Can I make the dough ahead of time?
-
Yes, you can refrigerate the cookie dough for up to 24 hours before baking. Let it sit at room temperature for 15 minutes before scooping and stuffing with the filling.
- → What's the best way to crush Oreos for the filling?
-
Place Oreos in a sealed plastic bag and crush with a rolling pin, or pulse in a food processor until fine crumbs form. You want small pieces for smooth texture throughout the filling.
- → Can I use gel food coloring instead of liquid?
-
Yes, gel food coloring works perfectly and may require less product to achieve the vibrant red color. Start with a small amount and add more as needed to reach your desired shade.
- → How should I store these cookies?
-
Store in an airtight container at room temperature for up to 3 days. For longer storage, refrigerate for up to a week. Bring to room temperature before serving for best texture.
- → Can I freeze the stuffed cookie dough?
-
Yes, freeze the stuffed dough balls on a baking sheet until firm, then transfer to a freezer bag. Bake from frozen, adding 1-2 extra minutes to the baking time.
